nikon f3 user manual
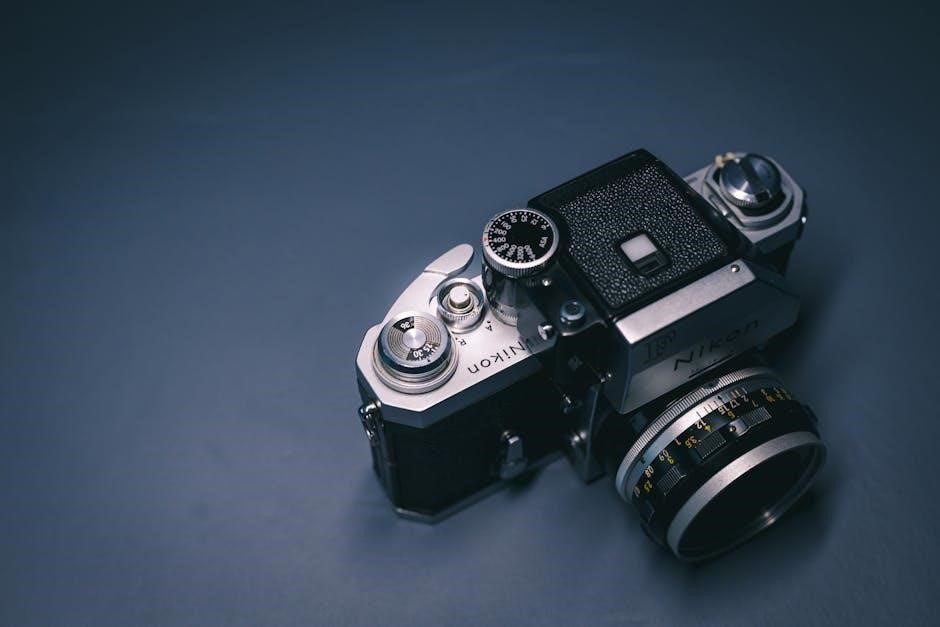
The Nikon F3, introduced in 1980, is a legendary professional SLR camera renowned for its durability and versatility. Designed for photographers seeking precise manual control, it offers advanced features like interchangeable viewfinders and a wide range of compatible lenses, making it a favorite among photography enthusiasts;
Key Features of the Nikon F3
The Nikon F3 offers manual shutter speed control from 1/2000 sec to 8 sec, including B and T modes. It features automatic stepless shutter speed control, manual aperture control, and interchangeable viewfinders, making it highly adaptable for professional photography needs and various shooting conditions.
2.1 Overview of the Nikon F3
The Nikon F3, introduced in 1980, is a professional-grade single-lens reflex (SLR) camera celebrated for its robust construction and adaptability. Designed to meet the demands of professional photographers, it combines advanced features with intuitive manual controls. The F3 supports interchangeable viewfinders, allowing photographers to choose between options like the DE-2 Eye-Level Finder or the DW-3 Waist-Level Finder, depending on their shooting style.
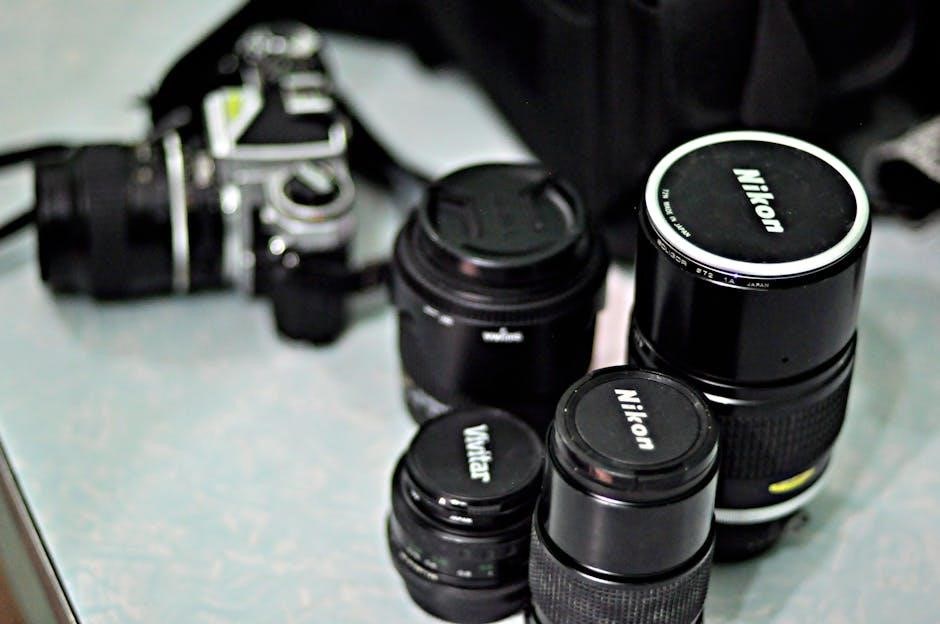
The camera is compatible with a wide range of Nikkor and Series E lenses, including AF-Nikkors, making it versatile for diverse photography genres. Its electronic shutter system offers stepless automatic control, while also providing manual settings for precise exposure management. The F3’s design emphasizes durability, with a titanium-clad body and weather-sealing, ensuring reliability in challenging environments.
Additional features include compatibility with the MD-4 Motor Drive for rapid film advancement and the ability to use flash units for enhanced lighting control. The F3’s modular design allows photographers to customize their setup, catering to both personal preference and professional requirements. Its enduring popularity among collectors and enthusiasts underscores its reputation as a timeless tool in photography history.
2.2 Shutter Speed Control
The Nikon F3 features a highly advanced shutter speed control system, offering a wide range of settings to suit various photographic needs. The camera provides electronic control for shutter speeds from Bulb (B) mode to 1/2000 of a second, allowing for precise exposure adjustments. Additionally, it includes manual mechanical control at 1/2000 second for situations requiring absolute precision.
The shutter speed dial is designed for intuitive operation, enabling seamless transitions between automatic and manual modes. When set to “A,” the camera operates in aperture-priority automatic mode, where the shutter speed is automatically selected based on the aperture and film speed. To switch to manual control, the dial must be depressed and turned to the desired speed.
Unique features include the Bulb (B) mode for long exposures and the Time (T) mode, which keeps the shutter open as long as the release is pressed. These modes are particularly useful for creative techniques such as light painting or capturing motion. The F3’s shutter system is also known for its reliability and durability, making it a trusted tool for professional photographers.
Overall, the Nikon F3’s shutter speed control is a testament to its versatility, catering to both automatic convenience and manual precision, ensuring exceptional results in diverse shooting conditions.
2.3 Aperture Control
The Nikon F3 provides precise aperture control, essential for achieving optimal depth of field and exposure in various lighting conditions. The aperture is controlled through the lens, with settings typically ranging from f/1.4 to f/32, depending on the lens used. This wide range allows photographers to create sharp, detailed images or artistic effects with shallow focus.
When in aperture-priority mode, the camera automatically adjusts the shutter speed based on the selected aperture and film speed, ensuring accurate exposures. This mode is particularly useful for controlling depth of field, making it easier to isolate subjects or capture extensive detail in landscapes.
For manual operation, the F3 allows photographers to set both aperture and shutter speed independently, providing full creative control. The aperture ring on Nikon lenses is designed for smooth operation, enabling quick and precise adjustments. This feature is especially beneficial for photographers who prefer a hands-on approach to their craft.
The F3’s lens compatibility extends to a wide range of Nikkor and Series E lenses, offering versatility in different photographic situations. Whether using high-speed primes or zoom lenses, the aperture control ensures consistent performance and image quality. This flexibility makes the Nikon F3 a robust tool for both professional and enthusiast photographers.
2.4 Metering Modes
The Nikon F3 features advanced metering modes designed to provide accurate exposure control in various lighting conditions. The camera offers two primary metering modes: center-weighted and spot metering, ensuring versatility for different photographic situations.
Center-weighted metering is the default mode, providing a balanced exposure by prioritizing the central area of the frame. This mode is ideal for general photography, as it minimizes overexposure in high-contrast scenes. Spot metering, on the other hand, measures light from a small, specific area (approximately 6mm in diameter), allowing precise control when shooting in challenging lighting conditions. This mode is particularly useful for capturing details in bright highlights or shadows without overexposing the image.
The F3’s metering system is highly sensitive, operating in a range of EV -1 to EV 18, making it suitable for low-light and bright environments alike. The camera’s exposure compensation feature complements the metering modes, enabling photographers to fine-tune exposures by ±3 EV in 1/3-stop increments. This level of control ensures that users can achieve their desired results, even in complex lighting scenarios.
Combined with its interchangeable viewfinders, such as the DE-2 Eye Level Finder, the F3’s metering system offers unparalleled flexibility. Optional finders like the DW-3 and DW-4 provide additional metering capabilities, further enhancing the camera’s adaptability to different shooting styles. This robust metering system is a key reason why the Nikon F3 remains a favorite among photographers who value precision and reliability.
Parts Nomenclature
The Nikon F3 is designed with a variety of controls and components that work together to provide precise photographic control. Understanding the layout and function of these parts is essential for effective use of the camera.
The camera features an interchangeable viewfinder system, with the standard DE-2 Eye Level Finder providing 100% frame coverage. Additional finders, such as the DW-3 and DW-4, offer specialized functionality for different shooting needs. The shutter speed dial, located on the top plate, allows manual control of exposure times from 1/2000 sec. to 8 sec., as well as Bulb (B) and Time (T) modes.
The ASA film speed setting, located on the lens mount, enables easy adjustment of film sensitivity. The lens release button, positioned on the front of the camera, facilitates quick lens changes. The film advance lever, on the top right, is used to advance the film and cock the shutter. The frame counter, adjacent to the shutter speed dial, keeps track of exposures made.
Other key components include the exposure compensation dial, metering mode switch, and battery compartment. The tripod socket at the base of the camera provides stability for tripod mounting, while the mirror lock-up lever reduces vibration during exposure; Each part is carefully designed to enhance the shooting experience, ensuring the F3 remains a versatile and reliable tool for photographers.
Basic Operation
Start by loading film, ensuring it aligns correctly. Set the ASA film speed to match your film. Frame your shot, adjust shutter speed and aperture, and press the shutter release to make exposures. Advance the film and repeat for the next frame.
4.1 Loading Film
Loading film into the Nikon F3 is a straightforward process designed to ensure quick and efficient operation. Open the camera back by releasing the latch on the right side. Align the film leader with the red mark on the insert, then gently pull it across to the take-up spool. Secure the film by advancing the rewind lever slightly until it clicks. Close the camera back firmly to ensure proper sealing. The F3 features auto-exposure control, which remains canceled until the frame counter reaches 1, streamlining the loading process. Advance the film by turning the rewind lever or using the motor drive (if equipped) until the first frame is ready. The frame counter will indicate the number of exposures remaining. Always ensure the film is properly loaded and the back is closed securely to prevent light leakage and exposure errors. This mechanism ensures your film is ready for shooting, maintaining the F3’s reputation for reliability and precision in professional photography.
4.2 Setting ASA Film Speed
Setting the ASA film speed on the Nikon F3 is a critical step to ensure accurate exposure readings. Locate the ASA dial, positioned on the shutter speed dial. Lift and rotate the dial to align the desired ASA/ISO value with the white index mark. The F3 supports a wide range of film speeds, from ASA 12 to ASA 6400, catering to various lighting conditions and film types. Ensure the dial is securely locked after selection to prevent accidental changes. When using the camera in Auto or Aperture Priority modes, the ASA setting directly influences the exposure calculations. In Manual mode, it serves as a reference for setting aperture and shutter speed. Always verify the ASA setting matches your film type before shooting to achieve optimal results. The F3’s design allows for quick and precise ASA adjustments, making it adaptable to diverse photographic situations. Properly setting the ASA film speed is essential for harnessing the camera’s full potential and delivering high-quality images consistently.
4.3 Making Exposures
Making exposures with the Nikon F3 involves a straightforward process that combines precise control with intuitive design. Once the film is loaded and the ASA is set, frame your subject through the viewfinder, ensuring proper focus. In Manual mode, adjust the aperture and shutter speed until the exposure meter needle aligns with the center mark. This ensures a balanced exposure. For Aperture Priority mode, set the aperture, and the camera automatically selects the appropriate shutter speed. The exposure compensation dial allows for fine-tuning exposures by +/- 2 stops in 1/3-stop increments, providing flexibility in challenging lighting conditions. The F3’s metering system offers center-weighted metering, prioritizing the central 12mm of the frame for accurate readings. When using flash, the camera synchronizes with compatible units, ensuring proper flash exposure. Always check the viewfinder for critical information such as shutter speed, aperture, and exposure compensation. For long exposures, use the Bulb (B) or Time (T) modes, where the shutter remains open as long as the release is pressed or until the timer expires. Properly handling the camera and film ensures consistent results; With its robust design and precise controls, the Nikon F3 delivers exceptional performance for photographers seeking manual control and reliability.
4.4 Changing Lenses
Changing lenses on the Nikon F3 is a straightforward process designed to ensure compatibility and maintain the camera’s functionality. To begin, ensure the camera is turned off or in a safe mode to prevent damage to the internal components. Locate the lens release button, typically found near the base of the lens mount. Press and hold this button while gently twisting the lens counterclockwise until it stops. This action disengages the lens from the mount. Once the lens is removed, inspect the mount for any debris or dust, which should be carefully cleaned with a soft brush or cloth to prevent contamination.
To attach a new lens, align the lens mounting index (the white dot on the lens) with the corresponding mark on the camera body; Gently twist the lens clockwise until it clicks into place, ensuring it is securely fastened. Avoid touching the mirror or internal components during this process. After installing the new lens, check for proper alignment and functionality by taking a test exposure.
When changing lenses, always handle them by the barrel to avoid smudging the glass surfaces. Use a lens cleaning cloth to wipe away any fingerprints or debris from the lens surfaces. If using interchangeable viewfinders, ensure the correct one is installed before changing lenses to maintain proper camera operation. By following these steps, you can safely and effectively change lenses on your Nikon F3, maximizing its versatility and performance.
Detailed Instructions
This section provides in-depth guidance for advanced camera operations, including exposure compensation, flash usage, and bulb/time modes. It ensures users can master the Nikon F3’s sophisticated features for precise control over their photography, enhancing both creative and technical aspects of image capture.
5.1 Exposure Compensation
Exposure compensation on the Nikon F3 allows photographers to adjust the brightness of their images by overriding the camera’s metered exposure. This feature is essential for capturing scenes with complex lighting conditions, such as high-contrast environments or backlit subjects. To use exposure compensation, photographers can manually adjust the exposure by +2 to -2 EV in 1/3-stop increments. This adjustment is made using the exposure compensation dial, which is designed for easy access and precise control.
When using exposure compensation, it’s important to consider the metering mode. The Nikon F3 offers both center-weighted and spot metering, allowing photographers to choose the most appropriate mode based on the subject. By combining metering modes with exposure compensation, users can achieve more accurate and desired results in various lighting scenarios.
For example, in a backlit portrait, increasing the exposure compensation ensures the subject is properly illuminated without overexposing the background. Conversely, decreasing the exposure compensation helps retain detail in bright areas, such as skies or reflective surfaces. This level of control makes the Nikon F3 highly versatile for both professional and enthusiast photographers.
Always remember to reset the exposure compensation to zero after use to avoid unintended adjustments in subsequent shots. This feature, combined with the camera’s manual controls, ensures photographers have complete creative freedom over their exposures.
5.2 Using Flash
The Nikon F3 supports flash photography, offering versatile options for capturing well-lit images in low-light conditions. The camera features a hot shoe mount on the top of the prism, allowing compatibility with a variety of flash units, including Nikon’s dedicated Speedlights. To use flash, ensure the flash unit is securely attached and turned on.
The F3 allows for both manual and automatic flash control, depending on the flash unit used. For manual flash, set the aperture according to the flash unit’s guide number and the distance to the subject. The camera’s built-in flash metering or an external flash meter can assist in determining the correct exposure settings.
When using TTL (Through-The-Lens) flash units, the F3 automatically adjusts the flash output based on the scene’s brightness. However, this feature is only compatible with dedicated Nikon flash units. Non-dedicated units may not function properly and could potentially damage the camera’s circuitry.
To synchronize the flash, set the shutter speed to 1/60th of a second or slower. Faster shutter speeds may result in incomplete flash coverage. Always test the flash before shooting to ensure proper synchronization and exposure.
For additional control, the F3 allows for flash exposure compensation, enabling photographers to fine-tune the brightness of the flash output. This feature is particularly useful for achieving balanced lighting in challenging environments.
Remember to consult the flash unit’s manual for specific instructions, as compatibility and functionality may vary. Proper use of flash with the Nikon F3 enhances creativity and ensures professional-quality results in diverse lighting conditions.
5.3 Bulb and Time Modes
The Nikon F3 offers Bulb (B) and Time (T) modes for extended exposure control, ideal for low-light photography, light trails, or creative effects. In Bulb mode, the shutter remains open as long as the release button is pressed, allowing for exposures of any duration. Time mode enables preset exposures from 1 second to 8 seconds when set to the T position on the shutter speed dial.
To use these modes, set the shutter speed dial to B or T. For Bulb mode, press and hold the shutter release button until the desired exposure is achieved. Use a remote release or the camera’s self-timer to minimize camera shake. In Time mode, the shutter will close automatically after the selected duration.
When using Bulb or Time modes, the camera’s metering system is bypassed, so exposures must be calculated manually or with an external light meter. These modes are particularly useful for astrophotography, nighttime cityscapes, or artistic effects like blurred waterfalls or traffic.
Be cautious with long exposures, as they can cause camera shake or noise. Always use a tripod and consider using the mirror lock-up (MLU) function to reduce vibrations. Batteries drain faster in these modes, so ensure the camera is powered with fresh batteries or an external power source.
Bulb and Time modes provide photographers with unparalleled creative control, allowing for unique and expressive results in challenging lighting conditions.

Batteries and Power Management
The Nikon F3 requires SR44 or LR44 silver-oxide batteries for operation. Always use fresh batteries for reliable performance, especially in cold conditions. Turn off metering when not in use to conserve power. Replace batteries every 12-18 months or when exposure accuracy diminishes.
6.1 Battery Types and Installation
The Nikon F3 operates on SR44 or LR44 silver-oxide batteries, which provide reliable power for its electronic functions. These batteries are widely available and offer a long service life. To install the batteries:
- Open the battery compartment, located on the bottom of the camera;
- Insert two SR44 or LR44 batteries, ensuring the positive (+) terminal faces upward.
- Close the compartment securely to avoid any power interruptions.
Using incorrect battery types may cause malfunction or damage to the camera. Always check the battery compartment for corrosion or damage before installation. The camera’s manual recommends replacing batteries every 12–18 months or when exposure metering becomes inconsistent. Proper battery installation ensures accurate metering and reliable operation of the Nikon F3’s advanced features.
6.2 Power Conservation Tips
To maximize battery life in your Nikon F3, consider these power-saving strategies:
- Turn Off the Camera: Switch the camera off when not in use to prevent unnecessary battery drain.
- Use Manual Mode: Engage the manual mode for basic operations, reducing reliance on electronic functions.
- Limit Flash Use: Avoid frequent use of the built-in flash or self-timer, as these features consume significant power.
- Store Properly: Keep the camera in a cool, dry place and remove batteries during long periods of inactivity to prevent leakage.
- External Power Options: Consider using an external battery pack or optional motor drive for extended shooting sessions.
By following these tips, you can extend the life of your batteries and ensure consistent performance from your Nikon F3.
Focusing System
The Nikon F3 features a robust manual focusing system designed for precision and reliability. The camera utilizes a helicoid lens mount mechanism, allowing for smooth and accurate manual focus adjustment. Photographers can easily focus using the lens focus ring, which provides tactile feedback for precise control.
The F3 is compatible with a wide range of Nikkor lenses, including AI and AIS models, ensuring compatibility with Nikon’s extensive lens lineup. For enhanced focusing accuracy, the camera offers interchangeable focusing screens, such as the standard Type K screen with a split-image prism and microprism collar, which aid in achieving sharp focus quickly.
Additionally, the F3 supports optional accessories like the MF-14 Data Back, which can further enhance the focusing experience by providing additional functionality. The camera also allows for manual focusing override in certain modes, giving photographers greater control over their compositions.
While the F3 does not feature autofocus, its manual focusing system is highly regarded for its precision and durability, making it a favorite among professionals and enthusiasts who value tactile control over their photography process. The optional motor drive units can also be used for faster film advance, but focusing remains a manual operation.
Leave a Reply
You must be logged in to post a comment.